|
Untitled Page
ARCHIVED FORUM -- April 2007 to March 2012
READ ONLY FORUM
This is the first Archived Forum which was active between 17th April 2007 and
1st March February 2012
Latest post 04-04-2011 7:44 PM by Jandyt. 137 replies.
-
 08-11-2007 3:04 PM
|
|
-
 Jandyt
 
 - Joined on 04-01-2007
- Clitheroe, Lancashire, UK
- Posts 13,004

|
D I Y foam replacement on S120s. Step by step with photo's....... by Andy T
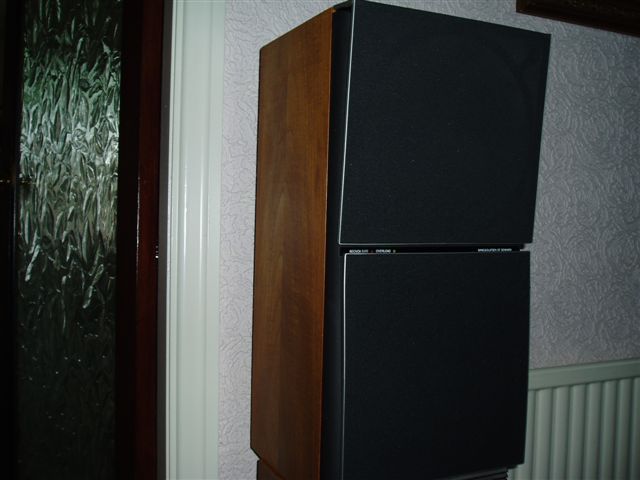
Last week I purchased a pair of Beovox S120s from eBay for just £23. There was no guarantee of condition so I suspected they were sure to have foamrot.
Over the next few weeks/months I am attempting to do my own repair and decided it might be nice to share with other Beoworlders my progress by photographing each stage of the repair. I am sure I will make mistakes or do things in a way that might not be quite right and hopefully others can learn from my errors. If any mods out there think it's a bad idea to do this thread, speak now or forever hold your piece peace!
You know how carried away I get and as Lee knows, I don't know much about servers etc so don't know whether my photo's clog up the site or not. Andy T.
|
|
-
-
 Jandyt
 
 - Joined on 04-01-2007
- Clitheroe, Lancashire, UK
- Posts 13,004

|
Re: D I Y foam replacement on S120s. Step by step with photo's....... by Andy T
Now, before I start, I must make it clear to everyone that I am a non technical person and have never done anything like this before. I know that half way through this thread people will make suggestions and they will be appreciated. However, the underlying theme of this is to see if someone as thick as myself can do a satisfactory job. Hey, if it all goes wrong, it will have cost me a total of £35! On eBay these were described as a speaker set It was only by checking the product page I could work out that they were, in fact S120s I had asked the seller for the dimensions so I could check but the seller was "selling for my brother who is away at the moment" Any way, to cut a long story short, I won them I they arrived really quickly. First thing I did was open the box and sere if they were S120s and was delighted to find they were!  I had read up on the product page and, quote, "Described to the author by a B&O insider as one of the best passive speakers made by B&O." end of quote BTW, Who is the author? I took off the frets to see if they had foamrot. Yes, and a concave cone. 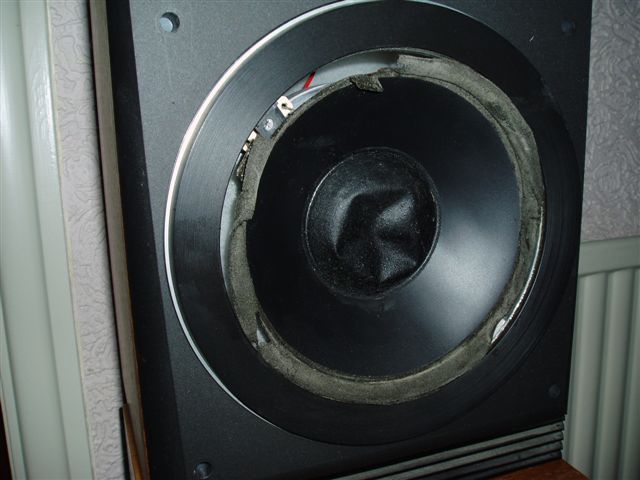
|
|
-
-
-
 wirralsimon
  - Joined on 04-17-2007
- Birkenhead, UK
- Posts 1,253

|
Re: D I Y foam replacement on S120s. Step by step with photo's....... by Andy T
Good luck tomorrow! I have been wondering about those kits for a while, I would be interested to know how easy they are to use. Simon
|
|
-
-
 j0hnbarker
  - Joined on 04-16-2007
- LS28/GB
- Posts 2,002

|
Re: D I Y foam replacement on S120s. Step by step with photo's....... by Andy T
Good luck Andy! Maybe you now need a Beomaster 6000/8000 to power these wonderful speakers when you have finished the refurb?
President, Beomaster 8000 Appreciation Society
|
|
-
-
-
 Jandyt
 
 - Joined on 04-01-2007
- Clitheroe, Lancashire, UK
- Posts 13,004

|
Re: D I Y foam replacement on S120s. Step by step with photo's....... by Andy T
Thank you all  Now, the first thing is always a good idea do gather together all the things you are likely to need. I decided to do this on my dining room table on a Wynciette sheet folded many times. 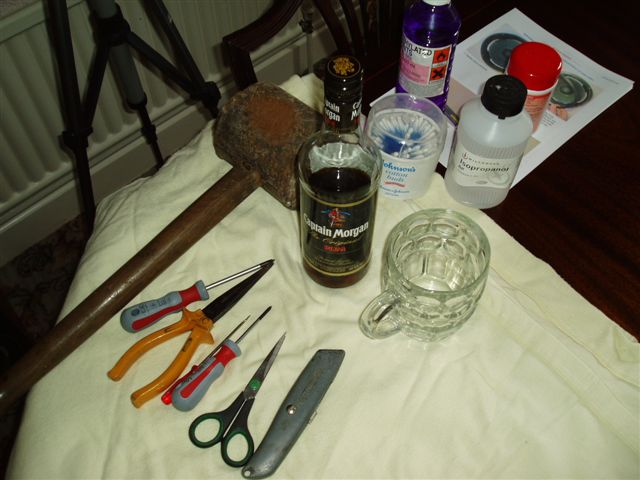
|
|
-
-
 Jandyt
 
 - Joined on 04-01-2007
- Clitheroe, Lancashire, UK
- Posts 13,004

|
Re: D I Y foam replacement on S120s. Step by step with photo's....... by Andy T
The dimple in the cone had been annoying me since I first saw it, so I decided I would sort that out first. I applied the brushy bit of the vacuum cleaner to it. If you do the same and it sucks the whole flippin' cone off then don't blame me! It was a calculated risk, I figured the brush hairs would hold the cone back and suck out the dimple. It worked fine  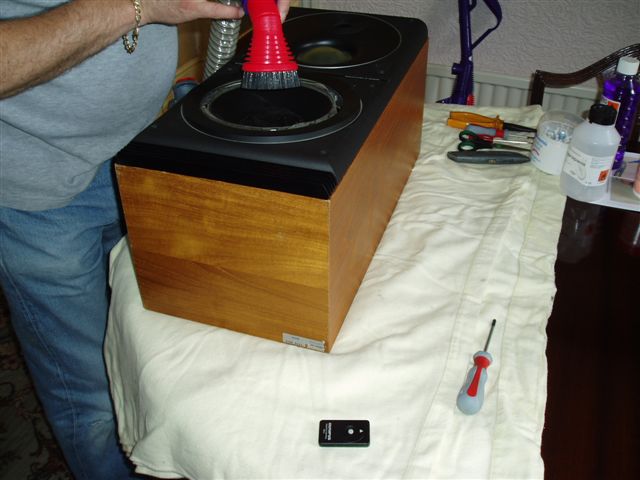
|
|
-
-
 Jandyt
 
 - Joined on 04-01-2007
- Clitheroe, Lancashire, UK
- Posts 13,004

|
Re: D I Y foam replacement on S120s. Step by step with photo's....... by Andy T
Down in the depths of six of the eight fret retaining holes is a Phlips screw, Make sure your screw driver is a good fit, I can't think of a worse place to strip the head of a screw! 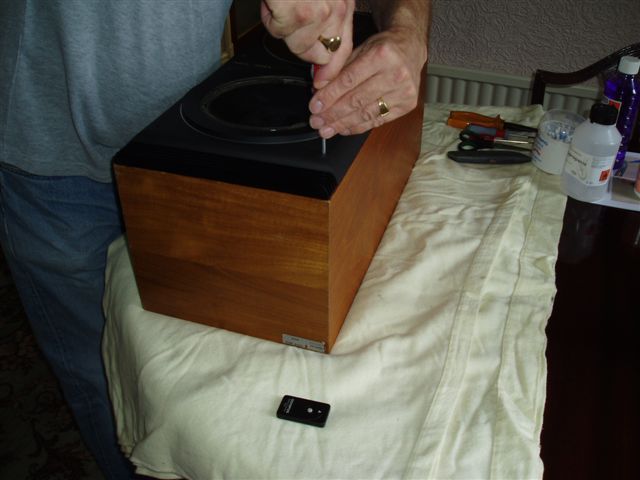
|
|
-
-
-
-
-
 Jandyt
 
 - Joined on 04-01-2007
- Clitheroe, Lancashire, UK
- Posts 13,004

|
Re: D I Y foam replacement on S120s. Step by step with photo's....... by Andy T
Look at that. Like a new 'un! You wouldn't think these were over twenty years old. 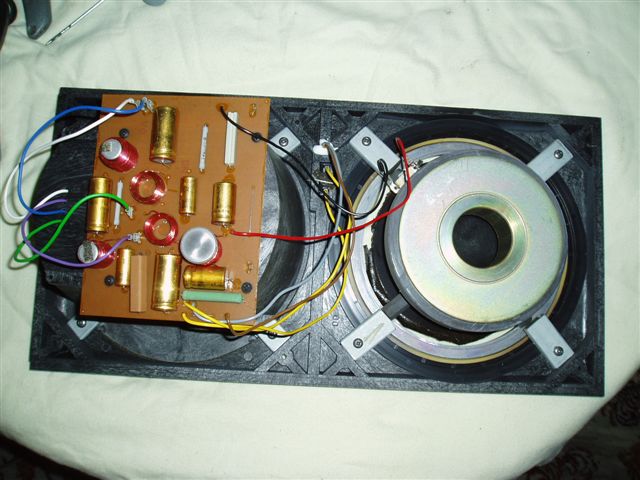
|
|
-
-
 Jandyt
 
 - Joined on 04-01-2007
- Clitheroe, Lancashire, UK
- Posts 13,004

|
Re: D I Y foam replacement on S120s. Step by step with photo's....... by Andy T
The driver is held to the front plate with these four brackets which have rubber blocks under them. These screws are really tight and I had to press on very hard. Once again, make sure you have a good fitting screw driver. Hope I don't slip! 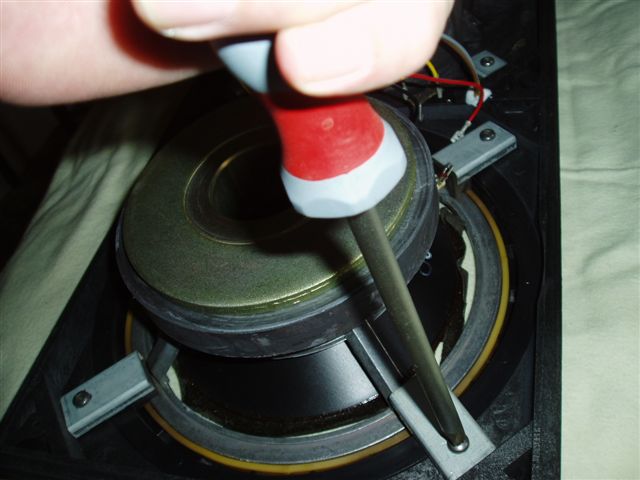
|
|
-
-
 Jandyt
 
 - Joined on 04-01-2007
- Clitheroe, Lancashire, UK
- Posts 13,004

|
Re: D I Y foam replacement on S120s. Step by step with photo's....... by Andy T
Once the driver is out, it doesn't want to part company with the rubber gasket and front ring. I had to gently tease it out with a small screw driver. 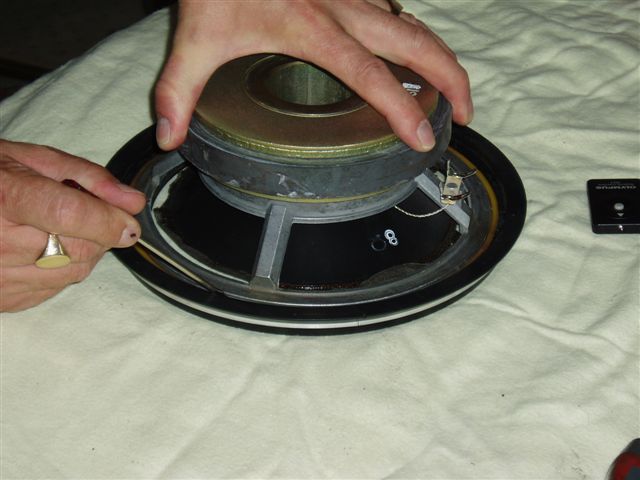
|
|
-
-
-
 Jandyt
 
 - Joined on 04-01-2007
- Clitheroe, Lancashire, UK
- Posts 13,004

|
Re: D I Y foam replacement on S120s. Step by step with photo's....... by Andy T
Before I put the front plate away, I noticed this attatched to one of the clamps. It doesn't seem to serve any purpose and is loose enough to rattle about. Anybody any idea? 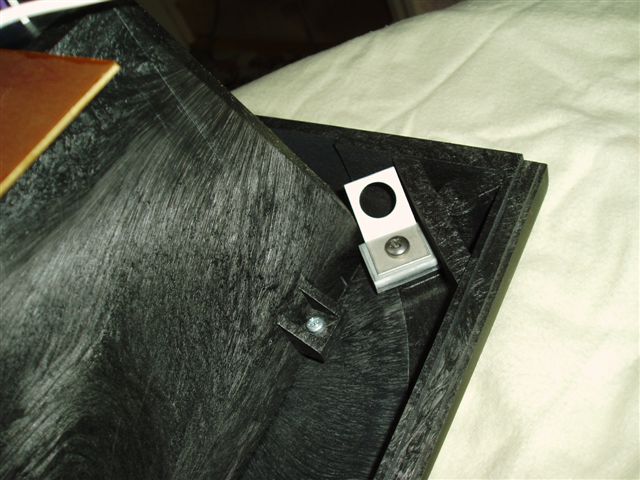
|
|
-
-
 Peter
Peter
  - Joined on 02-12-2007
- Posts 9,572

|
Re: D I Y foam replacement on S120s. Step by step with photo's....... by Andy T
 jandyt: jandyt:
"Described to the author by a B&O insider as one of the best passive speakers made by B&O." end of quote
BTW, Who is the author?
Me!! And the insider was Ronnie , the first moderator of the official site who looks after the museum. He should know!
|
|
-
-
-
 Dillen
  - Joined on 02-14-2007
- Copenhagen / Denmark
- Posts 5,008

|
Re: D I Y foam replacement on S120s. Step by step with photo's....... by Andy T
I believe the strange fitting-thingy with the hole in it was used for handling at the assembly line, - "cranes" and conveyor rails.
Of course it should be fastened and unable to rattle, the ones I've seen have all been fastened.
You could also dismount it. Martin
|
|
-
-
 Jandyt
 
 - Joined on 04-01-2007
- Clitheroe, Lancashire, UK
- Posts 13,004

|
Re: D I Y foam replacement on S120s. Step by step with photo's....... by Andy T
Cheers Martin.
The other one is the same, rattling about even though the screw is tight. I think I will take them off.
Yes Peter, I thought the author may have been you. Why don't you put your name on the articles?
I met Ronnie in Struer, really nice bloke. Andy T.
|
|
-
-
 Jandyt
 
 - Joined on 04-01-2007
- Clitheroe, Lancashire, UK
- Posts 13,004

|
Re: D I Y foam replacement on S120s. Step by step with photo's....... by Andy T
Here we have both drivers out and their rubber-like gaskets. You can see the 'orrible black stuff everywhere. 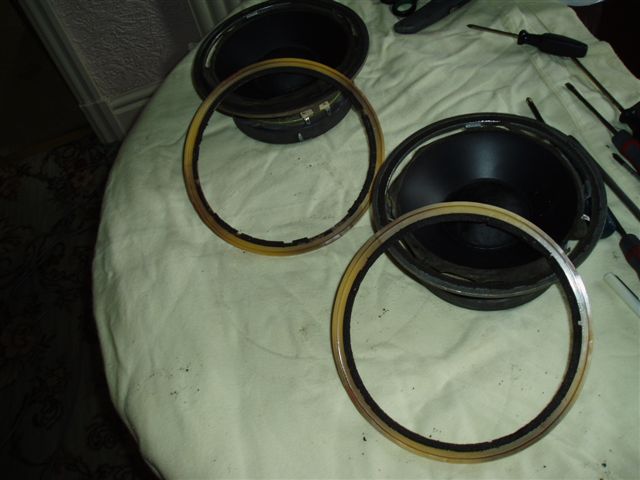
|
|
-
-
 Jandyt
 
 - Joined on 04-01-2007
- Clitheroe, Lancashire, UK
- Posts 13,004

|
Re: D I Y foam replacement on S120s. Step by step with photo's....... by Andy T
Now the laborious job of getting rid of it. For these gaskets I have decided to scrape them with a small screw driver. Here is my first mistake. The nasty black stuff is like wet tar and I was scraping it onto the sheet. This meant I was going to be working in my own mess. It can't be brushed up and the brushy bit of the vacuum wouldn't lift it either. 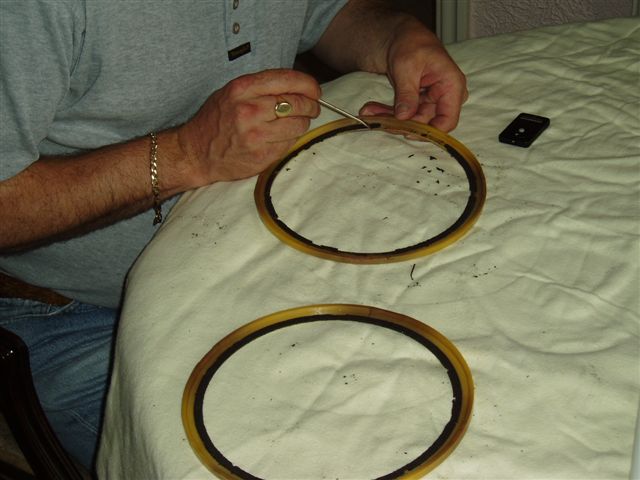
|
|
-
-
 Jandyt
 
 - Joined on 04-01-2007
- Clitheroe, Lancashire, UK
- Posts 13,004

|
Re: D I Y foam replacement on S120s. Step by step with photo's....... by Andy T
Ah! That's better. I can use loads of these kitchen rolls and keep changing them. Any body guess what the little black square thing is that keeps cropping up on my photo's? 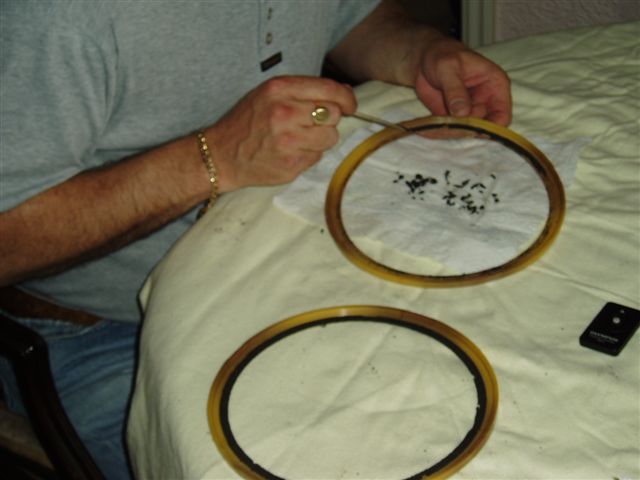
|
|
-
-
 Jandyt
 
 - Joined on 04-01-2007
- Clitheroe, Lancashire, UK
- Posts 13,004

|
Re: D I Y foam replacement on S120s. Step by step with photo's....... by Andy T
After I had removed the bulk of the foamrot from the gaskets I dipped some cotton-wool in meth's and cleaned the residue with that. It came off quite easily but still felt tacky so I put them in the sink with some Fairy liquid and scrubbed them with a nail brush. Perfect! 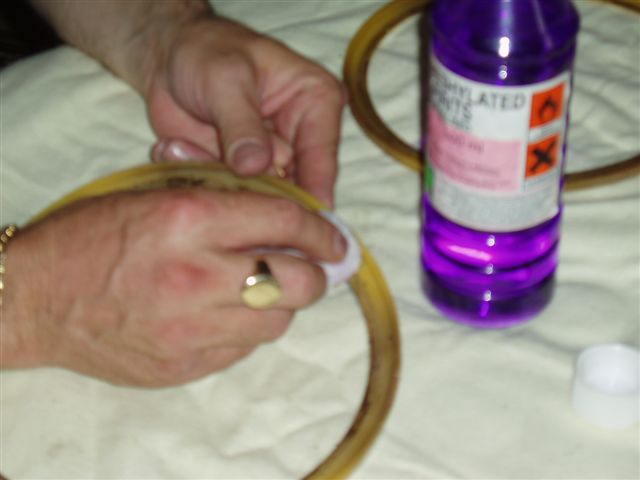
|
|
|
|
|