I agree that making your own plastic cursors can be quite involved because of the problems that have been listed above. My solutions to some of the issues that have been mentioned has been as follows:
The original cursor does have a “wedged” profile which I refer to as the ridges along the edges. If you simply fit the flat piece of plastic directly over the aluminium slide, the friction is very high and you end up scraping off all of the numbers and markings on the slide. Hence the ridges are very important if the plastic is to slide easily without scraping the aluminium. Since it is impossible for me to mill out the back surface of the plastic and retain a clear glass finish, I resorted to fitting some small plastic inserts. You can easily find some clear plastic packaging material which is about 0.5mm thick and cut out a small strip, approximately 3mm wide and 34mm long, to provide the bearing surface for the cursor. The narrower the bearing surface, the easier the cursor is to slide. Two drops of superglue along the hidden edge will hold it in place so that the mini holes can be cut and the unit assembled easily. With the 0.5mm insert, the thickness of the shoulder of the cursor needs to be reduced from about 3mm to 2.5mm. This solution has worked very well for me.
Making the cursor lines hasn’t been easy and I have experimented with several techniques. The colours needed are orange for the BM3000 and green for the BM4000. I have never resorted to “scoring” the line because that didn’t seem to be necessary but I might give that one a try – it has potential. One can use two pieces of straight edged adhesive tape to form a 0.5mm wide channel and use a permanent marker to fill it in. However, I usually found that the colour ran into the adhesive and didn’t give the desired straight line. At the moment, my preferred solutions are:
Cut a very thin line of insulation tape with a sharp Stanley knife and stick this directly onto the cursor glass. With this solution, it is essential that the thickness of the tape is less than the thickness of the plastic that you have used for the ridges otherwise it will drag on the aluminium and go out of shape very quickly.
The second solution is to paint a wide strip with the permanent marker using a few coats to get a solid looking colour. I then use a very thin, clean straight edge and a cloth which is very slightly damped with isopropyl alcohol to wipe off the unwanted colouring on both sides and leave the thin line in the correct place.
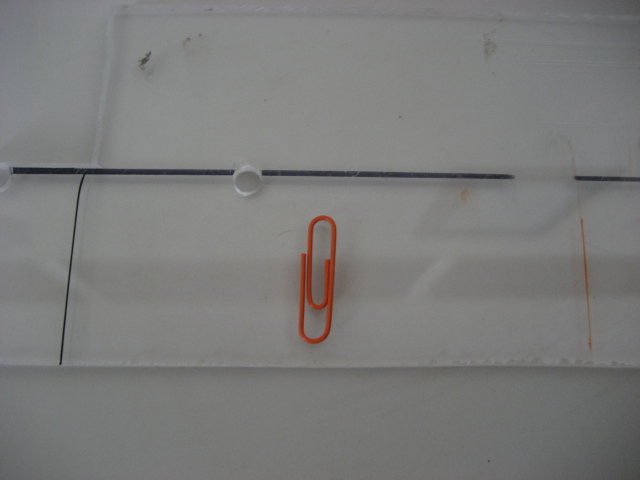
Some of my practice attempts are shown in the picture below. The thin black line is the masking tape and this give a good strong finish but can be too thick at times – it is quite hard to cut a half millimetre sliver of tape. The orange line is the permanent marker, slightly thinner but it can be uneven in places.
These are my solutions that have kept me going. I am always interested in new techniques so keep them rolling. This is an excellent forum for new ideas.
Regards
Geoff
