|
Untitled Page
ARCHIVED FORUM -- April 2007 to March 2012
READ ONLY FORUM
This is the first Archived Forum which was active between 17th April 2007 and
1st March February 2012
-
 12-22-2010 2:45 AM
|
|
-
 Agent00soul
  - Joined on 11-10-2010
- Solna, Sweden
- Posts 61

|
Refoaming Beovox CX50 and CX100
I got a pair of CX50 and a pair of CX100 that need refoaming.
A couple of questions:
1. Dillen talks about shimming the coils. How do you do that, exactly?
2. White glue seems to be recommended for glueing the rings but does that really stick to the metal frame? My idea is to use Casco water-based contact glue. This doesn't dry as quickly as traditional contact glue and can be adjusted before it sticks, if you mount the parts soon after applying the glue.
3. There is a 6.8 uF cap in the crossover (Beovox CX50). I suppose this is electrolytic. Would it be a good idea to replace this with a polyester cap?
|
|
-
-
Dillen
  - Joined on 02-14-2007
- Copenhagen / Denmark
- Posts 5,008

|
Re: Refoaming Beovox CX50 and CX100
I've written a lot about this subject and with all that can go wrong I am
afraid to sound negative. My main concerns are all the woofers that gets
damaged in DIY-attempts. The CX woofers are still available but almost
all other 1980's B&O woofers aren't and modern replacements just aren't as good.
Everytime I think I've seen all that can go wrong, a woofer with a new issue comes in.
Last week I had a woofer that was dropped on the floor distorting the
metal basket beyond repair.
"It slipped out of my hands, can you fix it ?"
The pro refoam'ers are worth their cost. Refoam'ing is not as easy as most
surround suppliers try to convince you and some of the cheaper surrounds
just doesn't fit anywhere. You can do a search and read a lot more.
But there are success stories too.
Some people are better DIY'ers than others.
Some people just have more luck.
Fair enough, but hardly a week goes by without a failed DIY attempt arriving
here by post.
I like challenges but some of them are just a bit too far gone to rescue
and that's really a shame.
1. It's all a matter of centering the coil around the center piece and it's
almost always done by inserting shims.
Some refoam kits come with little cardboard pieces that are supposed
to fit between the coil former and the magnet center piece.
I never saw any that fitted particularly well and woofers don't all have
the same gap so don't expect to be able to use those. You can try but don't think
you are doing something wrong if they don't fit.
If you are determined to DIY, you can cut pieces from plastic sheets of
different thickness and see if you can come up with a suitable fit.
I suppose most refoam'ers have their own methods. I use some special
made tools, CNC machined rings and holders, specifically made for each
driver type.
Sometimes the spider also needs adjusting the same way as the outer surround.
Mainly on larger woofers that were played with bad surrounds for a long time
so the whole cone assy have sacked a bit. It's rare to see on the CX drivers.
2. If white glue is what we in Denmark call woodworkers glue, it will be
nothing but trouble and I simply cannot see how anyone can recommend it.
It hardens completely, becomes brittle and will not bind to the metal basket.
I have seen it used on some of the drivers that come here and the only
good thing I can say is that it is usually easily removed, often without
damaging the surround.
The cone is a different matter though; On polypropylene cones (plastic material)
the glue will easily come off, almost by itself but it is a lot of trouble
if it's a cardboard cone. Water will losen it but it will easily end up a mess.
Contact glue can also be a mess and most of them will pull lines that can easily
end up inside the coil where it will be very difficult to remove or across
the cone where it won't look good.
I would recommend when you buy new surrounds, order some proper speaker cement.
You will also need new dustcaps, get them a bit larger in diameter than the original
to make them cover any glue remains from the old dustcaps.
Speaker cement is very easy to work with, it settles reasonably well within
10 hours and completely within about 24 hours or so.
It has an incredibly strong bond to almost any material and remains just
slightly flexible and elastic (I use it for glass panel repairs too).
IPA will losen it if needed.
3. You could do that, or just fit a new electrolytic type.
I dare say, you won't hear much difference in the CX50 speakers, really.
Martin
|
|
-
-
Agent00soul
- Joined on 11-10-2010
- Solna, Sweden
- Posts 61
|
Re: Refoaming Beovox CX50 and CX100
Many thanks for your quick and thorough reply Martin.
I don't doubt pro refoamers are worth their cost. There is however an additional cost for shipping the speakers back and forth (to Denmark?) and there is also hassle with packaging them, risk of damage in shipping etc. I'm quite experienced in precision mechanics, electronics soldering etc. and I didn't pay much for the speakers so I want to give it a try. I'll try with the CX50s first and if that doesn't go well, I'll have a pro do the CX100s.
I have checked one woofer so far and the spider seems good. I can push the cone in whith no scraping whatsoever.
The Casco contact glue fits your description for speaker cement quite well. It is water based so it won't damage the foam, it does not pull lines at all and it's fairly hard but still slightly flexible and elastic when dry.
|
|
-
-
Dillen
- Joined on 02-14-2007
- Copenhagen / Denmark
- Posts 5,008
|
Re: Refoaming Beovox CX50 and CX100
If the Casco glue, you are talking about, is the black one, I would say
go ahead and try it.
It doesn't pull lines but I'm not sure it's water based, certainly
doesn't smell that way.
First make sure that it doesn't attack and/or melt the foam surrounds.
(You have a PM).
Martin
|
|
-
-
Agent00soul
- Joined on 11-10-2010
- Solna, Sweden
- Posts 61
|
Re: Refoaming Beovox CX50 and CX100
I received my CX100 today, and had a look at the crossover:
The bottom woofer is connected in series with a a coil, as expected.
The top woofer however, is connected in series with this coil and another coil that is paralleled with a capacitor. A weird thing about this second coil is that it has an iron core, just like a transformer. I thought this led to unlinearities.
The tweeter is connected in series with the lower woofer and bypassed by the first coil and also in series with the upper woofer - coil/capacitor combination.
I suppose the coil/capacitor is a bandstop filter. In conjunction with the other coil it will probably attenuate all frequencies exept the lower bass range to the top woofer. And the tweeter must in some way be affected too, but it is unclear how. It is clear however, that the two woofers will not have the same frequency response.
|
|
-
-
Craig

 - Joined on 03-29-2007
- Costa Del St Evenage
- Posts 4,855
|
Re: Refoaming Beovox CX50 and CX100
Whenever I have refoamed speakers I have always used the same method. So far I have never had any problems. Probably done around 10 - 12 pairs now.Mostly CX's. My method is as follows.
Glue the new surround to the cone, and let the glue set for at least 24 hours.
Then I connect a 1.5 volt battery to the driver so that it pulls the coil in.
Then I hold the surround in place on the frame using clothes pegs, then disconnect the battery.
Before glueing the new surround to the frame, I check the coil is not rubbing by pressing it in a few times.
Then removing one peg at a time I glue the surround in place then replace the peg, before mov ing on to the next one.
Craig
For millions of years, mankind lived just like the animals. Then
something happened which unleashed the power of our imagination. We
learned to talk and we learned to listen..
|
|
-
-
Agent00soul
- Joined on 11-10-2010
- Solna, Sweden
- Posts 61
|
Re: Refoaming Beovox CX50 and CX100
Thanks for the tip about the batteriy Craig! I had intended to do as you describe, except for the battery. Now I'll try the battery trick too. Om monday I will buy a fresh bottle of glue. Then the work can begin.
|
|
-
-
Agent00soul
- Joined on 11-10-2010
- Solna, Sweden
- Posts 61
|
Re: Refoaming Beovox CX50 and CX100
I didn't find the glue that I had originally intended to use. But after some research I found another that might even be better.
It's called Casco Marin & Teknik in the nordic countries. I don't know what it is called elsewhere. It's avaiable in both white and black. Naturally, I chose the black version.
I have now glued the foam edge to the paper cone on one woofer. So far, everything seems fine.
The instructions said to apply glue to one of the parts but I applied a thin coat to both the edge of the paper cone and the foam surround. After pushing the foam against the cone with a small screwdriver, some excess glue seeped out, which was easy to remove with the screwdriver.
Now I'll leave the glue to set untill tomorrow.
|
|
-
-
Craig
- Joined on 03-29-2007
- Costa Del St Evenage
- Posts 4,855
|
Re: Refoaming Beovox CX50 and CX100
When I have done this I raid the kitchen for a suitable size cup or something that fits the inside of the ring perfectly. Then left some weight on the top of it, until the glue sets.
Craig
For millions of years, mankind lived just like the animals. Then
something happened which unleashed the power of our imagination. We
learned to talk and we learned to listen..
|
|
-
-
Agent00soul
- Joined on 11-10-2010
- Solna, Sweden
- Posts 61
|
Re: Refoaming Beovox CX50 and CX100
 Craig: Craig:
When I have done this I raid the kitchen for a suitable size cup or something that fits the inside of the ring perfectly. Then left some weight on the top of it, until the glue sets
Good idea. But the glue I use tacks fairly quickly and the advantage with my method is that I can tidy up excessive glue before it sets.
|
|
-
-
Agent00soul
- Joined on 11-10-2010
- Solna, Sweden
- Posts 61
|
Re: Refoaming Beovox CX50 and CX100
Last night I started glueing the outer edge, using Craig's method (see earlier posts). The battery pulled the cone in perfectly and after applying the pegs, the cone seemed to be well centered. I first glued it in two spots (12 and 3 o'clock) and later in the evening in the remaining two spots. The glue sets in about two hours. Tonight I'm going to glue the rest of the edge, inbetween the four spots. So far the work seems to be going well.
|
|
-
-
Agent00soul
- Joined on 11-10-2010
- Solna, Sweden
- Posts 61
|
Re: Refoaming Beovox CX50 and CX100
The rest of the edge is glued now. Tomorrow I'll be able to listen to the result.
|
|
-
-
Jandyt

- Joined on 04-01-2007
- Clitheroe, Lancashire, UK
- Posts 13,004
|
Re: Refoaming Beovox CX50 and CX100
Dillen:
But there are success stories too.
Some people just have more luck.
Martin
 
|
|
-
-
Agent00soul
- Joined on 11-10-2010
- Solna, Sweden
- Posts 61
|
Re: Refoaming Beovox CX50 and CX100
I have now connected the loudspeaker to my Beomaster 901 and listened carefully. I used a synthesizer and a drum machine to get "pure" sounds but I also listened to the radio.
When playing a sampled electric bass, there was a slight buzzing now and then. The strange thing was that the buzzing often stopped after a second and if I played the same note again, there was no buzzing. As I suspected the (unrestored) Beomaster, I tried with the other channel instead. Now there was no buzzing at all! I really need to recap that Beomaster!
Anyway, as far as I can tell, the speaker sounds as good as you can reasonably expect from the small Beovox CX50. Electric bass soloed is a tough test for any loudspeker. I can play fairly loud without the sound breaking up. So I'll have to consider this repair a success. Now there's five more woofers to do...
|
|
-
-
Agent00soul
- Joined on 11-10-2010
- Solna, Sweden
- Posts 61
|
Re: Refoaming Beovox CX50 and CX100
Now the second CX50 is done and it works as well as the first.
Here is how I did the work:

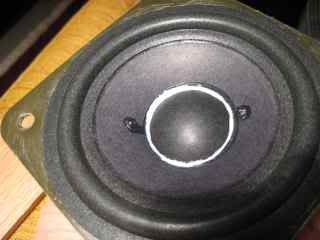
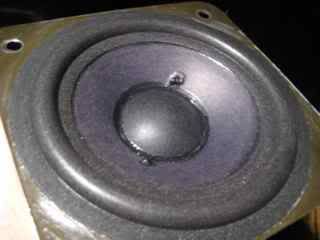
The speaker, as I received it.

First I removed the woofer from the cabinet. The outer edge of the foam roll edge was cut off with a knife.

Then I removed the inner edge from the paper cone.

The remaining black goop must be carefully scraped off the cone with a knife.

Glue is appled to the back of the new foam roll edge.

Glue is also applied to the edge of the cone.

Put the foam edge on the cone and check carefully that it is as centered as possible. Then push the edge of the foam down with a tool and work around the edge at least two turns. Recheck after a coulpe of minutes and push it down again if necessary.

The inner foam roll edge is now glued to the cone.

A battery (1.2 to 1.5 V) is connected to the speaker, which pulls the cone down (with the right polarity). After that, four clips are clipped onto the outer edge to fix it. Check that the coil doesn't touch the magnet by pushing down the cone at the edge in different places. Note that only one battery in the battery cassette in the picture is used.

The clips are removed one at a time and glue is applied between the foam and the speaker chassis, one quarter of the turn at a time (from one screw hole to the next). Put the clip back and let the glue dry. Then do the same with next clip, until all four sides are glued.

Resolder the wires and put the woofer back. Note that if you work on a Beovox CX100, the two woofers are different. The one marked 8480174 goes at the top and the one marked 8480173 goes at the bottom. Also be sure to connect the woofer with the correct polarity. The orange wire goes to the red lug and the yellow wire to the white lug. On the CX100 top woofer, the red wire goes to the red lug and the black wire to the white lug. Test the speaker after the glue has dried thoroughly.

Done!
|
|
-
-
Agent00soul
- Joined on 11-10-2010
- Solna, Sweden
- Posts 61
|
Re: Refoaming Beovox CX50 and CX100
Now both CX100 are done too. As far as I can tell, both work as they should and certainly sound very good.
Many thanks to Craig for the tip about usig a battery when centering the cones. This worked flawlessly every time for me. I never had to readjust after applying the clips to the surround. This made the work quite straightforward, eventhogh you have to work with care and not rush it, of course.
|
|
-
-
Søren Mexico
 
- Joined on 09-13-2007
- Mexico city
- Posts 1,621

|
Re: Refoaming Beovox CX50 and CX100
The battery trick sure is centering the cone, but its also pulled inward, at this point you glue 4 points of the surrond, now you let of the current and the cone returns to rest position, the surround is fixed at 4 points not in rest position, the rest of the surround is now glued and fixed in rest position. Surround foam is made to reverse to original shape whenever in rest, with 2 different fixed positions it can never do that.
I dont think this will do any difference in sound, but maybe it will cause the surrounds to brake at an earlier time than if fixed in the correct way (shimming). This is just my thoughts, and I may be wrong.
However, good job and I'm still looking for a pair of CX 100
Beosound 3000, BL 4000, BL 8000, BG 2404,BG 5000, BG CD50, Beocord 5000, BM 901, BM 2400, BM 4000, BV S45, BV 3702. There is nothing we cannot do, but a lot of things we don't want to do!!
|
|
-
-
Agent00soul
- Joined on 11-10-2010
- Solna, Sweden
- Posts 61
|
Re: Refoaming Beovox CX50 and CX100
Søren Mexico: Surround foam is made to reverse to original shape whenever in rest, with 2 different fixed positions it can never do that.
I dont think this will do any difference in sound, but maybe it will cause the surrounds to brake at an earlier time than if fixed in the correct way (shimming). This is just my thoughts, and I may be wrong.
Well, it will never be able to truly return to the rest shape as long as you glue the edge down. On my woofers, the edge rested around two millimeters above the frame before it was glued down. So I think your point is moot.
|
|
-
-
Søren Mexico
- Joined on 09-13-2007
- Mexico city
- Posts 1,621
|
Re: Refoaming Beovox CX50 and CX100
You are maybe right, and I'm sure it will take some 10 years at least before we see a result
Lycka til med hoegtalerne och tack foer en bra thread.
Beosound 3000, BL 4000, BL 8000, BG 2404,BG 5000, BG CD50, Beocord 5000, BM 901, BM 2400, BM 4000, BV S45, BV 3702. There is nothing we cannot do, but a lot of things we don't want to do!!
|
|
-
-
Craig
- Joined on 03-29-2007
- Costa Del St Evenage
- Posts 4,855
|
Re: Refoaming Beovox CX50 and CX100
Glad to see you refaoming went well.
Craig
For millions of years, mankind lived just like the animals. Then
something happened which unleashed the power of our imagination. We
learned to talk and we learned to listen..
|
|
-
-
Dillen
- Joined on 02-14-2007
- Copenhagen / Denmark
- Posts 5,008
|
Re: Refoaming Beovox CX50 and CX100
Finding surrounds that actually fits, both the sizes, lip angle(s) and cone height
can be difficult.
Many of the sets offered are generic surrounds, guaranteed to fit everywhere
and they are rarely as good as advertized.
2mm is not the whole world and your speakers will be fine and will provide for many years of
listening pleasure, I'm sure.
However, it is a fact that the foam should be at rest when the cone is the same.
Any pre-tension in either direction is bound to cause distortion since the cone
will be easier to move in one direction than the other or it will have a dead spot somewhere near the center.
Very easy to see if you have a good signal source, a microphone
and a scope or, even better, a distortion meter.
No moot and no mysteries. Pure physics.
Martin
|
|
-
-
-
-
-
stevepe
 - Joined on 06-26-2011
- San Francisco, California
- Posts 18

|
Re: Refoaming Beovox CX50 and CX100
Hi All,
I hope it's OK to revive this thread with some additional perspective. I just completed a re-do on one of my C75's woofers. It was rubbing after a refoaming job. (confirmed with the low Hz test tone), so I "faced my fear" and cut the center cap off that bad boy. Fortunately, I was able to cut away the tacky glued outside edge fairly easily with a razorblade. (No new surround needed!)
The shims held things in place nicely, and I have to say that it wasn't tough. The non-shimming methods usually/often work, I know, but I'm firmly in the shimming camp, now. I really like not wondering how well centered it is, and not having to be so fussy with the clothes pins, etc. Worth the trouble, IMO, to cut the cap and re-glue it. ( But I have really good "up close" vision)
I'm liking the the cut and fold back the cap method. Less stuff to buy.

Steve
|
|
|
|
|